|
Since October is Breast Cancer Awareness Month, TruFit is paying homage with a pushup pledge challenge! You can find out more about that here but in the meantime, to make sure everyone stays healthy during this month of pushups, we wanted to focus on the good, the bad, and the ugly. We've got a video for you and more pushup explanations below.
Ready? Let's get pumped!
It’s really easy to think of body weight exercises as “easy” or “things beginners do”. The truth is, using your body as your own personal exercise equipment can be SUPER challenging if done the right way! One bodyweight exercise that can easily go from a gentle warmup to a total-body burn is the mighty pushup.
Pushups are typically done with one goal in mind: To get the chest, shoulders, and triceps more cut/more defined. Sadly, some people bust out set after set of pushups with form that makes us go:
Today we're talking about the three biggest mistakes we see with pushup execution and how to fix them. It would be really easy to end this blog post right here by saying, “Well, if you engage your core everything will fall into place.” But that doesn’t help if you don’t know how to engage your core, or what you might be doing wrong in the first place! So let’s start discussing.
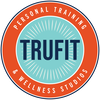
First, let’s talk about what a GOOD pushup has*:
At the top (or "up" position):
*There are many ways to do a pushup but we're focusing on the "standard" pushup for this example. 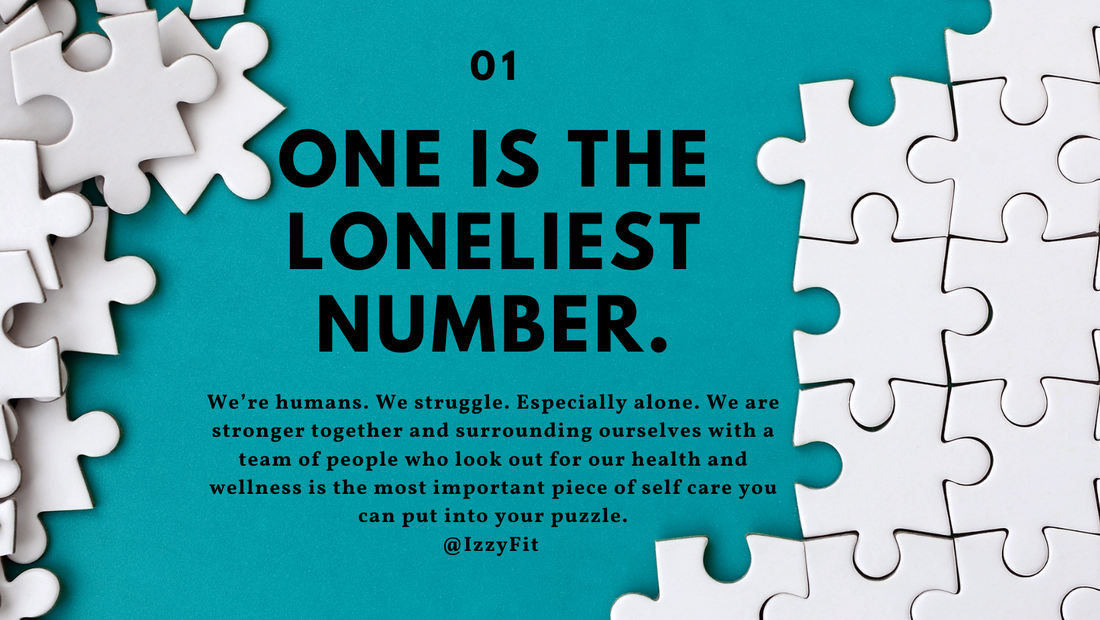
At the bottom (or "down" position):
Now that you know what we're shooting for with proper pushup form, let's dive into the common pushup mistakes and how to fix them! 
COMMON MISTAKE #1: BRINGING THE WRONG BODY PARTS TO THE FLOOR**
We know ultimately your straight line from your head to your heels stays intact throughout the pushup movement. Unfortunately, it’s common to see people’s faces reach for the floor, or their belly buttons or butts. If this is happening to you, acknowledge it and then change which body part you want pulled down toward the floor (hint: the chest)! THE FIX: Think about actively PULLING your chest toward the floor (try grabbing the turf/floor lightly with your fingers) rather than FALLING downward. Be intentional in your movements. This might be all that’s needed to fix the alignment issue, but if not here's an additional tip: Placing your tongue firmly on the roof of your mouth will help keep your head and cervical spine in alignment. Try it now! See how far forward your head goes when your tongue is NOT on the roof of your mouth. And, now, put your tongue on the roof of your mouth and try again. What did you experience? **The "floor" here means whichever level or surface you’re going to. If you’re doing wall pushups the “floor” is the wall; if you’re doing a kitchen counter pushup, the “floor” is the kitchen counter, etc. These cues and tips transfer to whatever pushup modification you’re doing. 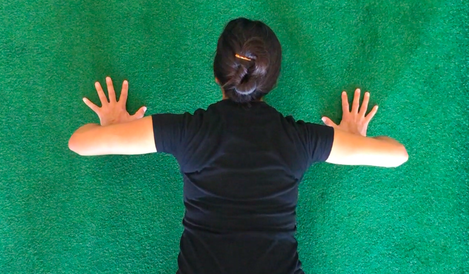
COMMON MISTAKE #2: FLARED OUT ELBOWS
At some point many of us learned to do pushups by bringing our elbows right out to the sides, creating a 90-degree angle at the armpit. Well, turns out that isn’t so friendly to our shoulders. THE FIX: Bring the elbows in closer to your waist (so they're pointing back behind you) to create more of a 45-degree angle. This will likely feel more challenging but in the big picture will make you stronger and your shoulders much happier! 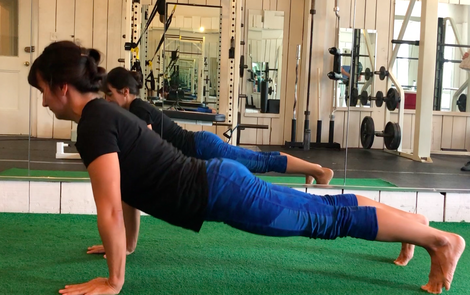
COMMON MISTAKE #3: DOING THE WORM
If you want to build a strong chest and core by doing pushups, then you won’t want to do your best frat party impression of the worm. The "up" part of the pushup should be initiated by your pecs, not by articulating each vertebra as your body hangs on the efforts of your shoulder joints. THE FIX: Actively pushing the floor away. Just as we talked about being intentional on the downward portion -- pulling your chest toward the floor -- you’ll want to do the reverse here. With fingers still clutching the ground after pulling yourself down, squeeze your pecs and push the floor away.
If pushups on the floor are a challenge right now, there are many other variations to work with. Here are just a few:
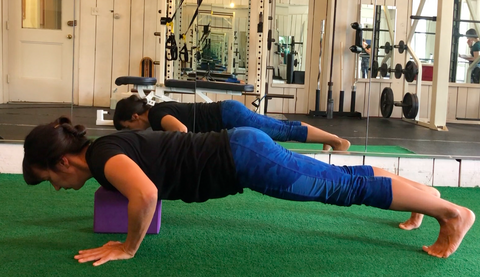
PUSHUP VARIATION #1: TO A YOGA BLOCK
If you’re close to a full pushup on the ground, you can train your way down by using a yoga block. The sensory feedback you get with something to reach for underneath you keeps you accountable: You know you’re training to a specific depth consistently. As you get stronger, you can change the position of the yoga block (e.g. placing it further downward, towards your belly and hips) to deepen your depth! 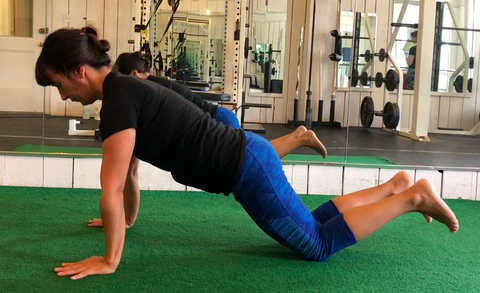
PUSHUP VARIATION #2: ASSISTED
Don't let these fool you! When done right, assisted or modified pushups will still be challenging. And just like with the yoga block, you can train with this variation to get stronger and ultimately work your way to a floor pushup. 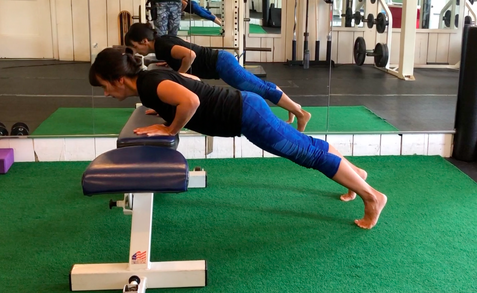
PUSHUP VARIATION #3: ELEVATED
Elevated pushups are another great way to groove the pushup pattern and train your central nervous system to have kickass form! If elevated pushups on a low surface feel too challenging right now, you can start with hands on a wall, then work your way down to the kitchen counter, then to the bathroom counter or a hefty side table, then to a (really sturdy) coffee table, and eventually to the floor! Let architecture be your gym. :) Thanks for reading! If you're feeling fired up about pushups, please consider participating in our pushup challenge benefiting breast cancer research, awareness, and treatment (happening all October)! And as always, feel free to contact us with any questions you might have! 
We hope this post has helped you feel differently than this T-Rex!
0 Comments
Leave a Reply. |
Archives
April 2024
Categories! |
 RSS Feed